Showing posts with label Dairy Free. Show all posts

Friday, August 31, 2012

Dairy Free Caramels, Caramel Sauce & Milk Duds! OH YEAH!


HOLY SMOKES I DID IT!! 

My hubby is allergic to dairy. I have mentioned this before. Well, I am a soul that enjoys a good challenge, so while boasting about my abilities to figure out non-dairy recipes for things that my hubby used to love my son offered up this challenge: "Mom, I will not believe that you are the master of all things non-dairy (Ok, maybe not his exact words, but close) until you can figure out a way to make dairy free Milk Duds!"
This little turkey! Surely he thought of the most milky pleasure my husband had ever indulged in and tossed it out to me as an impossibility....but alas young one, don't you know that your mother thrives when faced with such a challenge?! 

Jakob, Ladies and Gentlemen, my dear previously Milk Dud deprived husband....allow me to introduce to you not one, but THREE heavenly creations! I give you......

DAIRY FREE HEAVENLY CARAMEL SAUCE, 
DAIRY FREE HEAVENLY CARAMELS
and
DAIRY FREE MILK DUDS 

All divine! Caramel as good as the original milky version...with just the slightest coconut flavor to push it over the edge of amazing! ENJOY! 

(and now I shall go and find my humility once again! I let this one get to my head a little!) 

Alright, before we get too far into this, please make sure you have an accurately working candy thermometer, wax paper and I highly suggest parchment paper....cause it is amazing! 

The ingredients you will need for the caramel portion are: 
*1 cup Dairy Free Butter - Unsalted. (I used Best Life Butter)
*1 cup Light Corn Syrup
*14 oz of full fat Coconut Milk (I like Taste of Thai best)
*2 1/4 cup Brown Sugar
*1 tsp. Vanilla

You will also need around 1 hour cooking time, plus time for wrapping caramels. This recipe should make about 50 caramels, depending on size. 

Alrighty! Let's get started! 


  • Cut butter into smaller, even sized pieces, so it melts evenly. Melt over low heat. 


  • Carefully add sugar to the center of the pan. You don't want the sugar to crystallize on the side of the pan, or your caramel will turn out grainy. Not good. Just stir it in until it is well mixed, like this.....


  • Now stir in your Corn Syrup. 


  • Then your Coconut Milk. (Coconut will separate if refrigerated. That is great for recipes where you want to make a whipping cream out of Coconut Milk, or if you need the solids. For this, I just pull a can off the pantry of the shelf, shake it to be sure the solids and milk/water are combined and use it all.)
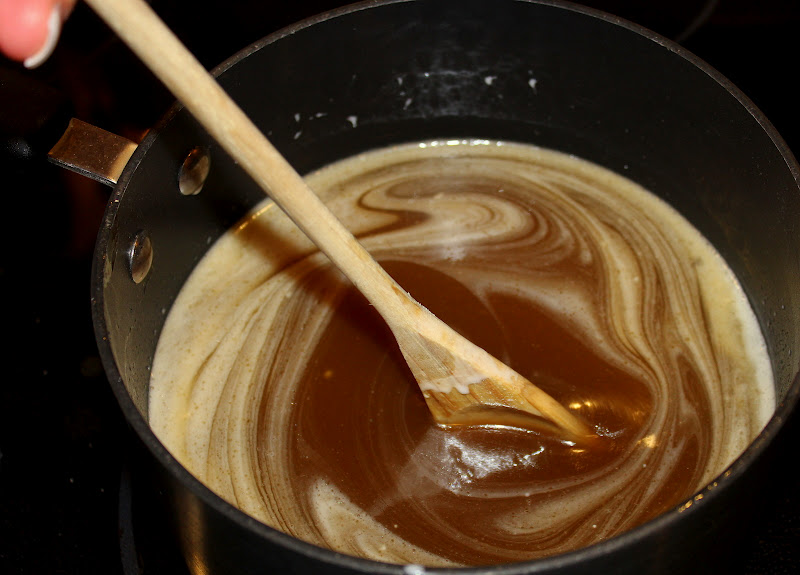


  • Cook and stir on medium heat. After one minute at medium, raise the temp to medium high until it starts to boil. You are only gradually raising the heat because you don't want to "shock" the candy.
  • Continue stirring. As you stir and as it comes closer to boiling the milk and butter will begin to blend. It should be blended or close to once it starts boiling. Be sure to keep with the stirring! It will get there! 


  • Once it starts to boil clip your candy thermometer onto the side of your pan. MAKE SURE the thermometer isn't touching the bottom of your pan. 
  • Reduce your heat to medium, and adjust as necessary to keep an even rolling boil. 
  • KEEP STIRRING! If you don't stir your caramel enough the butter will separate and you will end up with a greasy batch of caramel! Caramel takes a lot of time and a lot of work, but it is SO worth it in the end! 


  • Temperature does not raise at a steady rate! Watch carefully! 
  • When your thermometer reaches 230-233 degrees if want to pull any caramel out for caramel dip or sauce for ice-cream, apple crisp, or whatever, this would be the time to do it.  
  • At 234-240 degrees, caramel is ready for apples, if you want to go that route....or any other sort of thing you might want to dip for a caramel coating.


  • When the thermometer reaches 244 degrees (which will take about 30-45 min or so, from the start), remove the caramel from heat. 
  • Stir in Vanilla.


  • Pour Caramel onto a cookie sheet lined with parchment paper. 
  • Non-Dairy butter separates different from normal butter. This caused a different look to my caramel when I poured it out. No worries! It evened out and looked and tasted fantastic!
  • Cool for several hours! 


  • Once it is cooled you can use a knife, scissors, pizza cutter or whatever you fancy, to cut the caramels into pieces. Wrap in wax paper. 

AS FOR THE MILK DUDS......


  • Oh thank heavens for Ghiradelli semi- sweet chocolate chips! They are dairy free....did you know? Yes, they are semi sweet, so you don't get the same milk chocolate sweetness, but for a man deprived of all things chocolate until the discovery of these treasures, it was manna from heaven! Besides, the sweetness of the caramel counters the semi sweetness of the chocolate! They are delish! 
  • I melted a bag of these chips in a bowl in the microwave. Remember to melt for 30 seconds and stir, then melt and stir, until they are totally melted. 
  • I dropped each piece into the chocolate and picked it back up using 2 spoons. If you can find a better way, go for it! Just be sure to work fast! The caramels will melt in the hot chocolate and the chocolate will gradually get harder. 
  • Place each piece on a parchment lined cookie sheet and place in the fridge to harden the chocolate. 
ENJOY! 

Tuesday, March 27, 2012

Recipe #20: Blackberry Banana Ice Cream (non-dairy)


This is just a yummy little recipe I figured out and whipped up myself. So good, dairy free AND done in under 10 min! Perfect! 

BLACKBERRY BANANA ICE CREAM


INGREDIENTS:
  • 2 c. Blackberries
  • 1 Frozen Banana
  • 1 packet Stevia
  • Non-Dairy creamer
  • Honey (to desired sweetness)

DIRECTIONS: 
  • Add fruit & Stevia to blender. Start with about 1/4 c. of creamer. Blend. If you need more liquid gradually add very small amounts until it is the right consistency. 
  • Add honey or other sweetner to taste. 
  • Serve and enjoy! 


Monday, March 5, 2012

Recipe #19: BAKED FRIED CHICKEN

This is a recipe I posted a while ago on Our Life Uncommon. It is blowin up the joint over at Pinterest, as of late! It is honestly the best chicken I have ever had! AND it is crazy easy! Today I thought I should share it here! I wouldn't want any of you to miss this glorious KFC remake! YUM!! Here is the exact post......

This is, hands down, a family favorite! Everytime I make this everyone goes nuts! I have actually made it a lot easy! It is super easy, so it is easy for big groups! I made it for our little family. Then I made it for the weekly Lindstrom gathering at my in-laws house, which usually includes about 20-25 people. Then, because it was such a huge hit there, we suggested to Jake & Tyler (cousin), whom are both working on their "Citizenship in the Community" merit badge for scouts, that this would be a great dinner idea for the Ronald McDonald House in SLC. A few days later, we were on our way up there. Salad, bread, corn, mashed potatoes & gravy and this chicken were all on the menu. The boys worked their little hineys off and we served nearly 50 people! We cooked 4 big bags of chicken tenderloin strips, about 100 strips in all, and we knew the meal was a success when there was only 1 piece of chicken left and a lot of happy faces! :)

I am pretty sure that I have discovered the KFC secret recipe! It is DEAD ON! It is also baked...not fried and there isn't any skin! So you get to enjoy the taste of the seasoning, instead of pulling it off because of the slimy skin!

This is super easy and you are TOTALLY going to love it!

ENJOY!

{Baked Fried Chicken}


Place thawed chicken breast tenderloin strips in a bowl of milk. Let soak for 20-30 min.

Mix in a Gallon Size Ziploc or Large Bowl:  
1/2 tsp. Salt
1 T Season All
3/4 tsp Pepper
1 c. Flour
2 tsp. Paprika

Preheat oven to 400 degrees. Cut 1/2 stick of butter into a few pieces and place in a 9x13 pan. Melt butter in pre-heated oven.

Spread melted butter around the bottom of the pan. Lightly spray the pan, if needed, to make sure that there are no dry spots.

Shake excess milk off of chicken and completely coat each piece with the seasoning mix. You can either shake the chicken in the bag, until coated, or dip each piece in the bowl until coated.

Place each piece of chicken in the pan.

Cook for 15 min. Turn each piece of chicken and continue cooking for 15 more minutes, or until cooked through.

ENJOY!


Thursday, March 1, 2012

Recipe #18: BUTTERY BREADSTICKS


Remember how the other day you saw this delicious plate of Pepper Steak, green salad, and a yummy little bread stick? Well, you didn't think I would deny you the opportunity to know just how I made that little morsel, did you? Nope. I'm a bit nicer than that! 

BUTTERY BREADSTICKS 
From: World Wide Ward Cook Book 

Ok, now we are back to the fact that I DO NOT like bread. Weird I know. I mean, french bread, that crazy perfect bread at Zuppa's, all good, but they are the exception to my rule. My rule of bread is bad. No worries, my hubby and kids got to be the judges of this recipe and they give it a mighty thumbs up! They loved them, compared them to crazy bread, and devoured almost all of them! 

As for my judging of this recipe....they are super easy to make! SUPER EASY! I will totally make them again, often. 


INGREDIENTS: 
  • 1 T. yeast
  • 1 1/2 c. Warm Water
  • 2 T. sugar
  • 1/2 tsp. salt
  • 3 c. flour
  • 1/2 c. butter (I used a dairy free margarine)

DIRECTIONS: 
  • Preheat oven to 350.
  • Dissolve yeast in warm water and sugar. Let it stand until foamy. 
  • Place salt and flour in a mixer. Mix well. 
  • Add yeast mixture to the flour and mix well. 
  • Knead until smooth and elastic. Add a bit more flour, only if needed. 
  • Let dough rise for 10 min. 
  • Melt butter and pour into a baking sheet. 
  • Roll out dough into a rectangle about 1/4 inch thick. 
  • Cut into 1 x 4 inch strip using a pizza cutter. 
  • Roll each piece in butter covering all sides. (It will be totally soaked and seem like too much. It absorbs during cooking so much! Don't skimp)
  • Arrange in the baking sheet. Sprinkle with garlic salt or Parmesan cheese. 
  • Let rise 15-20 min. 
  • Bake for 15-18 min. 
  • Makes 12 bread sticks. 


Tuesday, February 28, 2012

Recipe #17: PEPPER STEAK


PEPPER STEAK
From: World Wide Ward Cookbook

This meal really surprised me. I was a little unsure about it, but thought perhaps my hubby would appreciate something that says "steak" in it. The cooked peppers and celery....OH MAMA! Cooked celery, don't overlook it! It is DELISH!! 

OH and I have an announcement, believe it or not, Jake sang my praises through this whole meal! HE TRIED IT....AND HE LIKED IT, nay, LOVED IT! I was pretty pumped! So, this meal comes with Jake's stamp of approval, now that is a rarity! 


INGREDIENTS: 
  • 1 lb. beef chuck steaks, fat trimmed
  • 1/4 c. soy sauce
  • 1 clove garlic
  • 1 1/2 tsp. fresh ginger, grated, or 1/2 tsp ground ginger
  • 2 T. Olive Oil (if you find you need more, add. Original recipe called for 1/4 c.)
  • 1 c. green onion, thinly sliced
  • 1/2 c. red bell pepper, cut into 1 inch squares
  • 1/2 c. green bell pepper, cut into 1 inch squares (I was fresh out. Doubled the red peppers)
  • 2 stalks celery, thinly sliced (don't skip this, even if you don't like celery)
  • 1 T. cornstarch
  • 2 Tomatoes, cut into wedges (optional, cause we are not fans at our house)

DIRECTIONS: 
  • Cut beef across the grain into 1/4 inch thick strips. 
  • In a medium bowl, mix soy sauce, garlic, ginger, and beef. Set aside. 
  • Heat oil in a wok or large pan. 
  • Add beef mixture and cook over high heat until beef is browned. 
  • Simmer over low heat for 30 min. until beef is tender. 
  • Add the veggies and cook over high heat for 10 min. 
  • Combine the cornstarch with water and add to pan. 
  • Stir and cook until the sauce thickens. 
  • Stir in tomatoes and cook through. 
  • Serve over mashed potatoes. 
  • Makes 4 servings. 


Wednesday, February 22, 2012

Recipe #15: COCONUT SHRIMP w/ Tangy Dipping Sauce


COCONUT SHRIMP w/ Tangy Dipping Sauce
From: Pampered Chef "It's Good For You" 

OH MERCY! If you are a fan of coconut shrimp, but you are used to it coming in a fried form, you are about to LOVE me! These babies are DIVINE! The sauce just makes it even more perfect! LOVE IT! I could make this once a week....or per night! :) Serve it as a main course or appetizer....or heck, dessert! They are that good! 


INGREDIENTS: 
  • 1 Lime
  • 2 tsp. finely chopped fresh Jalapeno Pepper
  • 1/2 c. Pineapple or Peach preserves (I actually used apricot, cause it was what I had) 
  • 1 lb. uncooked shell-on large shrimp (about 21-25 count), peeled and deveined. 
  • 2 Egg Whites
  • 2 T Cornstarch
  • 1 1/2 c. Sweetened Flaked Coconut

DIRECTIONS: 
  • Juice lime to measure 1 T. of juice. 
  • Remove seeds and finely chop jalapeno pepper. 
  • In a bowl combine lime juice, jalapeno pepper and preserves. Mix Well. 
  • Cover; refrigerate until ready to serve. 
  • Preheat oven to 400 degrees. Line cookie sheet with parchment paper (or spray lightly, but I like  LOVE parchment paper). 
  • Peel and devein shrimp, leaving tails on. 
  • In small bowl, beat egg whites on high speed until soft peaks form (tips of peaks will curl down when beaters are lifted). 
  • Place cornstarch and coconut on two separate plates. 
  • Holding shrimp by the tail, coat shrimp with cornstarch. Dip shrimp in egg whites, then coconut to coat. 
  • Arrange in a single layer on baking sheet. 
  • Bake 16-17 minutes or until edges of coconut are deep golden brown. Turn once after 8 minutes. 
  • Serve with sauce! 

Monday, February 20, 2012

Recipe #14: LEMON BLUEBERRY PUDDING CAKE


LEMON BLUEBERRY PUDDING CAKE w/COCONUT MILK WHIPPED CREAM
From: Pampered Chef: "It's Good For You" 

SO GOOD! I have to tell you that I am not a cake person, which means that I am also not a cobbler sort of person. However, I braved a try of this after the glowing reviews coming from my family. What a fabulous combo of flavors! You can use normal whipped cream if you want, but the slight coconut flavor combined with the lemon and blueberries....OH MY! A delicious dessert that tastes divine and isn't heavy at all! Totally a winner! 


INGREDIENTS: 
     
Cake & Filling
  • 1 can (21 oz) Blueberry Pie Filling
  • 1 pkg (18.25 oz) Lemon Cake Mix
  • 3 Egg Whites
  • 1 c. Water
  • 1/3 c. Olive Oil
Pudding
  • 1 Lemon
  • 1 c. Boiling Water
  • 1 pkg (3 oz) Lemon Gelatin
  • 2 T. powdered Sugar

DIRECTIONS: 
  • Preheat oven to 375 degrees. Lightly spray 9x13 baking pan. 
  • Spread filling over the bottom of pan. 
  • In a bowl combine cake mix, egg whites, water & oil. Whisk until smooth. 
  • Pour batter evenly over pie filling. 
  • For pudding zest lemon to measure 1 T. Juice lemon to measure 2 T. juice. 
  • Add gelatin to boiling water. Mix until completely dissolved. 
  • Add lemon zest and juice to gelatin. Mix. 
  • Pour gelatin mixture evenly over cake batter.
  • Bake for 35-40 min. or until toothpick comes out clean. 
  • Remove from oven and let stand for 10 min. 
  • Lightly dust with powdered sugar. 
  • Serve topped with Whipped cream
(For coconut whip cream, which makes this dessert totally dairy free, refrigerate canned coconut milk. Open can and scrape the thick cream off the top. Place in mixer. Add vanilla & powdered sugar to taste. Mix until stiff peaks form.) 


Wednesday, February 15, 2012

Recipe #13: BBQ Chicken, Onion & Bacon Pizza


BBQ CHICKEN, ONION & BACON PIZZA
Started From: Pampered Chef "It's Good For You"

I say "started from" because I basically got the idea and then flipped the whole darn thing on it's head! I must admit that we have cheated and actually have had this twice....we love it that much! And guess what...it is divine without cheese! Who knew?! You can add it if you want, but really, it holds it's own beautifully without it! 

We have decided that we will be keeping all ingredients for this baby on hand, at all times. It seriously comes together and is served in less than 30 min! So easy! So yummy! 


INGREDIENTS: 
  • 1 Large Onion, Sliced
  • 4-6 slices bacon cooked and cut into small pieces
  • 2 garlic cloves, minced
  • 2 cups diced chicken (or 2 cans canned Kirkland, we've tried it! Totally works great!) 
  • 1 Package (10 oz) refrigerated pizza crust (I used Pillsbury, it doesn't have dairy)
  • Parsley for garnish
  • 2 plum tomatoes (optional)
  • 1 c. Shredded cheese (optional)
  • Sweet Baby Rays BBQ Sauce (or other favorite)


DIRECTIONS:
  • Saute onion, bacon & garlic. Cook until onion is tender and bacon is cooked through. 
  • Stir in Chicken.
  • Stir in BBQ Sauce until it is the consistency you like. We like A LOT of BBQ Sauce. 
  • Unroll package of pizza crust and press with fingers or roll out on a lightly sprayed cookie sheet. 
  • Spread chicken mixture over the top of the dough leaving just a bit of crust visible around the edges. 
  • Add cheese and tomato, if desired. 
  • Sprinkle with fresh or dried parsley. 
  • Bake at 425 for 18 minutes, or until the edges of the crust start to turn golden brown. 
  • Remove from Oven and let stand for 10 min. 
  • Cut serve and ENJOY! 


Tuesday, February 14, 2012

RECIPE #12: Dairy Free, No Sugar Added Biscoff Ice Cream!


OH ME, OH MY!! I think my hubby has died and gone to spoiled rotten husband heaven! And he deserves it really. Anyone that must live without dairy goes through a fair amount of forced deprivation when it comes to desserts. No longer my friends, NO LONGER! 

This recipe originated from a dairy-full, sugar loaded option in the Vita Mix cook book. However, with a little tweaking and some trial and error we got it figured out! AND we have homemade ice cream in less than 5-10 min!! WOO HOO! 

Before I go any further, I must ask, Have you tried BISCOFF? Oh please! Race to your nearest store. Check for it near the peanut butter. If it isn't there, run to the next store, and then the next. Whatever it takes to find it! You must! Have you tried those delicious little cookies on the airplanes? Well, this is the creamy version of that and my mouth is watering just thinking about it! So let's move on! 

BISCOFF ICE CREAM
Peanut Butter can also be substituted, and should be tried because it is SURPRISINGLY DIVINE! This ice cream is a great base. Just mix all but the Biscoff and substitute with any flavor you feel the urge to try! 


INGREDIENTS: 
2/3 c. Non-Dairy Creamer
2/3 c. Biscoff or Peanut Butter
1 tsp. Vanilla
4 c. (about 2 trays) frozen Non-Dairy Creamer Ice Cubes
Stevia, to taste

DIRECTIONS: 
Pile all of the ingredients into your blender in order mentioned above. Blend on high until thoroughly mixed. 

Easy right? Now go look for a little this! You will thank me when you try it! 


Saturday, January 7, 2012

DAY 8: Speaking of Pumpkin Muffins....


ON THE MENU: 
  • Without my hubby home, we are totally going for an easy family favorite with Pumpkin & Spice Muffins! 

PUMPKIN SPICE MUFFINS
From: An old ward cookbook...this is a break away from the 3 cookbooks, but it is worth it! These things are SO delicious and filling! 


INGREDIENTS:
  • 1 1/2 c. Whole Wheat Flour
  • 1/2 tsp. Baking Soda
  • 1 tsp. Baking Powder
  • 1/2 tsp. Salt
  • 1/2 tsp. Ground Cloves
  • 1/4 tsp. Cinnamon
  • 1/4 tsp. Nutmeg
  • 2 Eggs
  • 1 c. Honey
  • 3/4 c. Canned Pumpkin
  • 1/4 c. Olive Oil
  • 3/4 c. Raisins
  • 1/2 c. Walnuts
DIRECTIONS: 
  • Mix all wet ingredients together. 
  • Sift Flour and all the dry ingredients. 
  • Combine wet & dry ingredients. 
  • Cook in papered or greased muffin tins. 
  • Bake at 350 Degrees for 20 min or until done. 
  • Makes about 18 muffins. 


TOMORROWS MENU: 
  • Going to a Family Dinner. Taking Veggie Tray and trying a new recipe for Hummus. 


Friday, January 6, 2012

DAY 7: Pumpkin Soup & Homemade Bread


ON THE MENU:
  • Pumpkin Soup
  • Homemade Bread
  • Green Salad
PUMPKIN SOUP
From: Vita Mix: Whole Food Recipes

OUR RATING: NO GO!!
Well, we discovered that we are NOT pumpkin soup people. I've heard people say how much they like it and I have been curious. Turns out, we may be pumpkin pie people, we may enjoy a good pumpkin bread or muffin, perhaps even a few pumpkin chocolate chip cookies, but pureed pumpkin soup....Nope! So this recipe is for those of you that can't get enough of the stuff! Enjoy! 


INGREDIENTS:

  • 2 c. Chicken or Vegetable Broth
  • 1/2 c. unsweetened Coconut Milk
  • 3 c. canned Pumpkin
  • 1 c. Onions, sauteed
  • 3 Garlic Cloves, roasted
  • 3 T. Brown Sugar
  • 1 tsp. Paprika (optional)
  • 1/2 tsp. Cayenne Pepper (optional)
  • 1 tsp. Nutmeg
  • Salt and Freshly Ground Black Pepper, to taste
DIRECTIONS:
  • Place all ingredients in a Vita Mix or other blender in order listed. Secure lid. 
  • Mix on high speed. Run for 6-7 minutes. (This heats the soup in a Vita Mix. I would imagine it would do the same in other blenders.)
  • Serve Immediately

HOMEMADE BASIC WHITE BREAD
From: Kitchen Aid Cookbook

OUR RATING: LOVE IT
Ok, so I haven't tried it. I am not a bread person! So, I left this one to the bread critics and this baby is passing with flying colors! It is super soft and moist and one thing that I really appreciate...it is easy and smells DIVINE! Give it a try! 

INGREDIENTS:
  • 1/2 c. Low-fat Milk (use coconut milk for non-dairy)
  • 3 Tbs. Sugar
  • 2 tsp. Salt
  • 3 Tbs. Butter or Dairy Free Margarine (Safflower or Earth Balance is best)
  • 2 packages Active Dry Yeast
  • 1 1/2 c. Warm Water (105-115 degrees)
  • 5-6 All Purpose Flour
DIRECTIONS:
  • Place milk, sugar, salt and butter in small saucepan. Heat over low heat until butter melts and sugar dissolves. Cool to lukewarm. 
  • Dissolve yeast in warm water in warmed mixer bowl. Add lukewarm milk mixture and 4 1/2 c. flour. Mix with a dough hook on medium-low for 2 minutes. 
  • Continuing on medium-low, add remaining flour, 1/2 cup at a time (dough should clean the sides of the bowl. Add a bit more flour if needed), and mix about 1 1/2 minutes, or until dough starts to clean sides of bowl. Knead on same speed about 2 minutes longer, or until dough is smooth and elastic. Dough will be slightly sticky to the touch.
  • Place dough in greased bowl, turning to grease top. Cover. Let rise in warm place, free from draft, about 1 hour, or until doubled in bulk. 
  • Punch dough down and divide in half. Shape each half into a loaf and place in a greased bread pan. Cover. Let rise in warm place, free from draft, about 1 hour, or until doubled in bulk. 
  • Bake at 400 degrees for 30 min., or until golden brown. Remove from pans immediately and cool on wire racks. 

TOMORROWS MENU:
  • Leftovers
  • On the brightside....Pumpkin Muffins for breakfast...and they are DELISH!

Tuesday, January 3, 2012

DAY 6: Teriyaki Pork Stir Fry


ON THE MENU:
  • Teriyaki Pork Stir Fry
  • Angel Hair Pasta 

TERIYAKI PORK STIR FRY
From: Pampered Chef: It's Good For You

OUR RATING: LOVE IT!!
Oh the flavor! I love something that is packed with flavor! This did not disappoint! We were all singing my praises while we devoured this meal! :) This one DEFINITELY makes the regular list! Delicious and as a bonus it was super quick and easy to make! ENJOY! 


INGREDIENTS:
  • 2/3 c. Soy Sauce
  • 1/4 c. Packed Brown Sugar
  • 1 Tbsp. Cornstarch
  • 2 tsp. peeled, finely chopped Fresh Ginger root
  • 2 Garlic cloves, pressed or minced
  • 1/4 tsp. Crushed Red Pepper Flakes
  • 1 lb. boneless Pork Loin Chops, cut into 1/8" strips
  • 1 medium Red Bell Pepper, cut in 1/4" strips
  • 6 oz. fresh Snow Peas
  • 1 bunch Green Onions with tops, cut into 1" pieces
  • 1 tsp. sesame oil, divided (I used olive oil & it was fabulous)
  • 1 (8 oz) can Bamboo Shoots, drained

DIRECTIONS:
  • In a small bowl, combine soy sauce, brown sugar and cornstarch; whisk until well blended. 
  • Add ginger root, garlic & red pepper flakes. 
  • Cut pork into 1/8" strips (if you place the meat in the freezer for a bit before slicing it will make it easier to get the really thin cut without mutilating the meat :) ). 
  • Add pork to soy sauce mixture (either in covered bowl or gallon size Ziploc bag). Refrigerate for 1 hour. 
  • Heat 1/2 tsp. oil in skillet over high heat until hot. Remove pork from marinade. Set marinade aside for later. Place pork in skillet and stir fry for 1-2 min. or until pork is no longer pink. Remove from skillet and keep warm. 
  • Heat remaining 1/2 tsp. oil in same skillet. Add bell pepper, snow peas and green onions. Stir fry 2-3 minutes or until veggies are crisp-tender. Return pork to skillet. Stir in reserved marinade and bamboo shoots. Bring to boil. Cook and stir 1 minute or until sauce is thickened. 
  • Serve over rice or noodles.   


TOMORROWS MENU:

  • Pumpkin Soup
  • Green Salad
  • Homemade Bread

Monday, January 2, 2012

Day 5: White Chili


ON THE MENU: 
  • White Chili
  • Green Salad

WHITE CHILI
From: Worldwide Ward Cookbook

OUR RATING: LIKE IT
Ok, I have to admit that I need to try this again! I would double the broth...and maybe even more. There is a limey green chili-ness about it. The flavor is great...it's just the lack of broth that left me wanting. I will have to say...I had some family over and everyone else totally loved it. Ryan said he wants it to make it back to our table again. So....it will! By the way, I doubled the broth and it's seasonings & made a couple other little changes for you below! Your welcome! :) 


INGREDIENTS:
  • 5 c. Water
  • 2 tsp. Lemon Pepper
  • 2 tsp. Ground Cumin
  • 3 1/2 c. Cubed Chicken Breast (Season with an additional 1 tsp lemon pepper & 1 tsp cumin. Cook thoroughly) or replace with Tofu for a vegetarian version.
  • 1 c. Onion, chopped
  • 1 Clove Garlic, minced
  • 2 Tbsp. Butter (can use a dairy free version)
  • 2 (19 oz) Cans of White Corn (can use frozen)
  • 2 (4 oz) Cans Diced Green Chiles, undrained
  • 2 (15 oz) Cans White Beans, undrained
  • 5 Tbsp. Lime Juice
DIRECTIONS:
  • Bring Water to Boil with Lemon Pepper and Ground Cumin. 
  • Add Chicken to water. 
  • In a frying pan, cook onion and garlic in butter until tender; add to soup. 
  • Stir in Corn & Green Chiles. Bring to a boil. 
  • Add Beans & Lime juice. Cook until heated through. 
  • Can serve with chips, sour cream, and cheese. 
  • Makes (8 Servings)

TOMORROWS MENU:

  • Teriyaki Pork Stir Fry


Saturday, December 17, 2011

DAY 4: Eclairs (with dairy free option)

YOUR WELCOME! 

I mean, lets just start there, shall we? You are going to LOVE me for these! 

Today is leftover night. Busy busy! But there must be a post, so let's give you a treat! I whipped these up for a scout meeting Ryan was having at our house. BIG HIT! They always are! And as a bonus, I put my wheels into motion and figured out a way to make them dairy free for my hubby! He loves me more now...and he thinks I am a genius! :) 

I have to be honest. I kinda broke the rules on this one. This didn't come from the cookbooks, it was an old favorite. However, I did have to re-invent it to make it dairy free....and they are divine, so I let them in! :) 

ECLAIRS

OUR RATING: LOVE IT! 
Oh, and perhaps I should mention that these babies are RIDICULOUSLY easy! A little more involved than  chocolate chip cookies, but not much and I would turn to these first because of how delicious they are! 


Let's start with the puffs. 


Just a note....follow these directions EXACTLY. Puffs can be finicky. 

  • In a small sauce pan boil 1 c. water & 1/2 c. of butter (for dairy free I used Safflower Butter. You can use another brand if you can't find this one by the butter at your store. Just make sure there isn't any dairy.) 
  • When the water is boiling and the butter is melted, remove from heat and pour into a glass bowl. 
  • Add 1 c. of flour, mix well. 
  • Microwave the bowl and mixture for 30 sec. Remove and stir. Repeat for 30 more seconds in the microwave.
  • Add 4 room temperature eggs. Beat until creamy. 
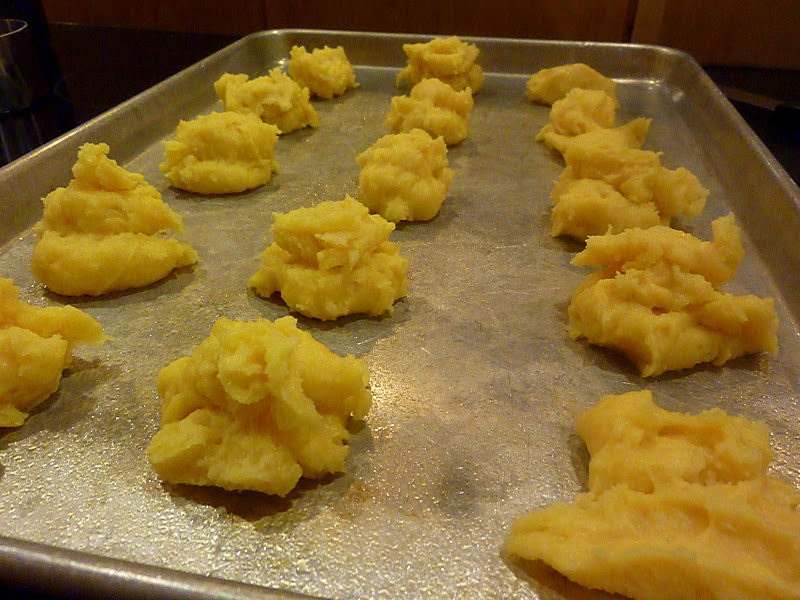
  • Spoon batter onto lightly sprayed cookie sheet. 12 large or 24 small....or whatever you feel like. 


  • I usually get a little bowl of water and wet my fingertips just a little bit and form the puffs a little. Seriously, go easy with the water. You want just enough to keep your fingers from sticking to the batter. 
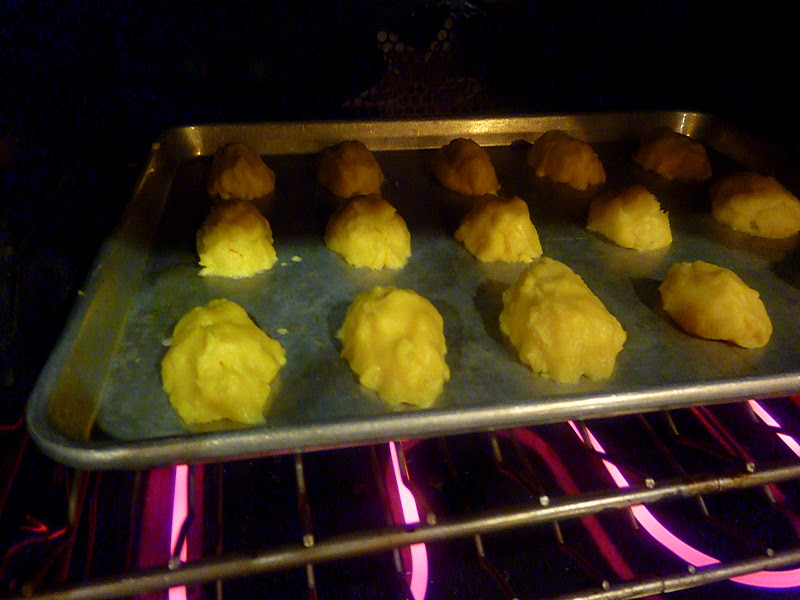
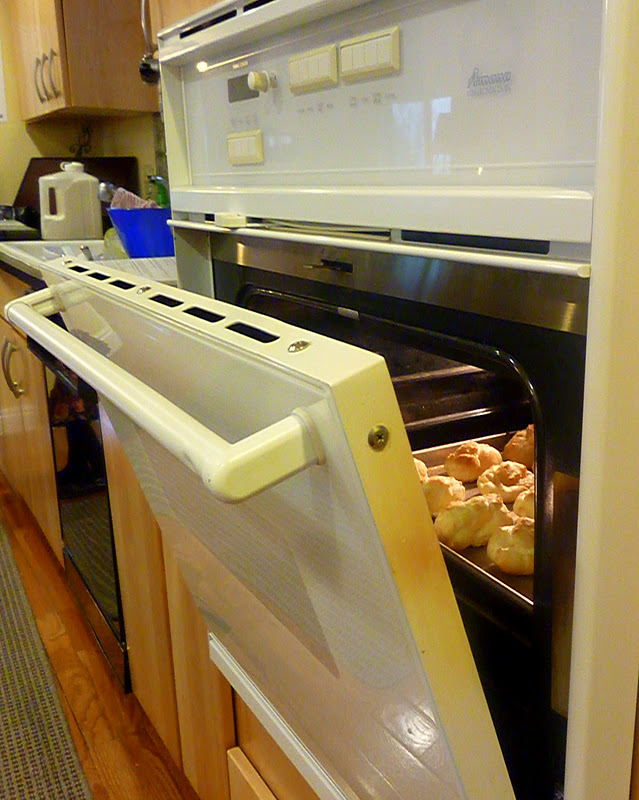
  • Bake @ 400 degrees for 30 min, or until starting to turn golden brown. Start watching them at about 20 min. Warning...only use your oven light or slightly crack the oven open for just a moment. Cold air will make these puffs collapse and then you will have to start over....you don't want to do that. 


  • Turn off the oven and crack the door open. Leave the puffs in the oven to cool until it cools completely. Every once in a while 1 or 2 might collapse a bit. You can try to salvage them with the cream. Sometimes they are just a loss, but most times you can get them to fill up. 


This is how they should look when they are done. YUM!

While the puffs are cooking, let's make the filling!  


Dairy Free option for filling & frosting, with pictures, at the end of the post. 
  • Mix 1 large box of Vanilla pudding mix with 1 1/2 c. milk. (coconut milk for dairy free) 
  • In a separate bowl mix 2 c. of Cool Whip with 1 Tbsp of Sugar until stiff peaks form. 
  • Mix cool whip mixture with pudding. 


  • Creamy or Rich & Creamy Milk Chocolate frosting, either Betty Crocker or Duncan Hines, is the best frosting for these. It combines perfectly with the puff and filling. SO GOOD! 


This is what I use to fill the puffs. You can use any frosting bag sort of thing. You just want to make sure that you have a pointy tip to stick through the side of the pastry. 


Like this! 

Fill each puff. If you have left over filling go back through and make sure that each is filled all the way. 

NOTE: Another option is to cut the puff in half and fill the center. Kinda like a roll. Then close it and frost the top. This is slightly more messy for the eater, but if you are doing a lot of these, this might be a good option. Just make them smaller. 


Frost the top and chill for at least an hour, more time is better. 

Serve and enjoy the happy faces! These babies are PERFECT! 

Now, for the Dairy Free portion. 


Ghiradelli makes semi-sweet chocolate chips. That makes chocolate anything SO much easier! 

I didn't measure this out. Just eye ball it. Depending on how many you are making. I also added a bit of coconut whip cream to thin out the chocolate. Adjust your amount of chocolate, if you would like to add the cream. Otherwise, melt the chocolate for 30 sec or so in the microwave and stir until it is all smooth. Microwave a little longer, if needed. Frost the eclairs and the chocolate will harden during chilling process.  


To make the cream open 2 refrigerated cans of full fat coconut milk. (do not shake) Skim the thicker cream off the top of the milk. Turn the mixer on medium high. Add sugar and vanilla to desired sweetness. 

Mix a little bit of this cream with the chocolate, if desired. Mix remainder with the pudding, instead of using cool whip. This will keep your filling dairy free. Fill according to above directions. 


My cream turned out pretty thin. Coconut milk cream is finicky like that. Sometimes you get a lot of thick cream and sometimes it is thinner. When I mixed that with the chocolate it made it thin. I spooned a bit over the top of the puff and immediately put it in the fridge. The cool thing about coconut milk is that it hardens in cold temperatures. This means that by adding it to the chocolate it becomes magic shell! 

After the chocolate hardened, I took it out of the fridge spooned more chocolate and put back in the fridge. These were seriously beautiful! They looked so good! 

Alright, I know the instructions make these seem super involved. They are actually very easy. I just wanted to make sure to be VERY detailed! Let me know if you have any questions! 

ENJOY!! 


TOMORROW'S MENU:
*White Chili


Friday, December 16, 2011

DAY 3: Parmesan Chicken, Italian Rosemary Bread, Strawberry Limeade and Apple Cherry Crisp!!


ON THE MENU: 
  • Chicken Parmesan
  • Strawberry Limeade
  • Italian Rosemary Bread
  • Green Salad
  • Apple Cherry Crisp (DF)

CHICKEN PARMESAN
From: "The Pampered Chef: "It's Good For You"

OUR RATING:  LOVE IT!!
Oh, I wish I had my new camera going for this one! The picture DOES NOT do justice! I have to say that every single bite my hubby took was followed by an "Oh my gosh babe!" Yeah, I'll take that as success! This is SO going on our permanent menu! 


INGREDIENTS: 
  • 8 boneless, skinless chicken tenders
  • 2 egg whites
  • 1 garlic clove, pressed
  • 1 c. seasoned croutons, grated (1/2 c. crumbs)
  • 1/4 c grated fresh Parmesan Cheese (I skipped this for dairy free)
  • 1 tsp. dried Oregano leaves
  • 1/8 tsp. black Pepper
  • 2 Tbsp. All-Purpose Flour
  • 4 oz cooked Angel Hair Pasta
  • 1 Jar Prego (or other favorite marinara)
  • 1/4 c. shredded Mozerella Cheese (I skipped this for dairy free)
DIRECTIONS:
  • Preheat oven to 425 degrees. 
  • Beat egg white until frothy. 
  • Press garlic into egg whites using a garlic press. 
  • Grate croutons and Parmesan cheese (I used my blender). Place on a plate or in shallow bowl. 
  • Add Oregano & Black Pepper to the crumb mix, mix well. 
  • Coat chicken with flour. Dip into egg white mixture. Coat both sides of each piece of chicken. Shake off excess. Discard any remaining mixture. Place each piece of chicken on a lightly sprayed pan. Bake for 20-25 or until chicken is no longer pink. 
  • Meanwhile, cook pasta according to package directions and drain. 
  • Heat marinara sauce. 
  • Plate pasta. Top with chicken and a small amount of marinara. Top with mozzarella. 


STRAWBERRY LIMEADE 
From: "Worldwide Ward Cookbook"

OUR RATING: LOVE IT!!
Totally just like Sonic! So so good! 


INGREDIENTS:
  • 2 Liters Lemon-Lime Soda (Sprite or 7 UP)
  • 1 qt. Frozen Strawberries with syrup
  • 6 Limes
DIRECTIONS: 
Pour lemon-lime soda into a punch bowl or large pitcher. Stir in frozen strawberries (I had to chop at them a bit for them to break up). Squeeze 4 limes into punch. Slice the 2 remaining limes and add to the bowl. 


ITALIAN ROSEMARY BREAD
From: "Worldwide Ward Cookbook"

OUR RATING: LOVED IT!!
I know! We have a lot of  "LOVED IT"s so far! But that is good! We are trying to add things we would like to have and I made my list based on things I thought we would like! 

I am not a bread person. However, I tried this and it was good! Ryan ate almost the entire loaf! He absolutely loved it! I set out a plate with olive oil, balsamic vinegar & cracked pepper! YUM! And super easy! 


INGREDIENTS:
  • 1 c. Water
  • 3 Tbs. Olive Oil
  • 1 1/2 tsp. Sugar
  • 1 1/2 tsp. Salt
  • 1/4 tsp. Italian Seasoning
  • 1/4 tsp. Pepper
  • 1 Tbsp. Dried Rosemary
  • 2 1/2 c. Bread Flour
  • 1 1/2 tsp. active Dry Yeast
DIRECTIONS:
  • This recipe is designed for a bread machine. If you have one, place ingredients in the machine in order suggested by manufacturer. Select white bread and press start. 
  • I do not have a bread machine. I proofed the yeast mixing the warm water, yeast & sugar in a bowl and setting aside. I mixed Oil, salt, Italian Seasoning, Pepper, Dried Rosemary & 1/2 of flour in my mixer until well blended. Then I added the proofed yeast and the remainder of the flour. The dough should clean the sides of the bowl. If it doesn't add a little flour until it does. When it does, set a timer and allow to mix for a few more minutes. Let the dough rise, covered, in a warm spot in your kitchen. Once it is risen form it into a loaf and place on a sprayed pan. Cover and let rise again. Once it has doubled it is ready to cook. 
  • Bake @ 350 until done. (I can't remember, but I think it was about 30 min)


APPLE-CHERRY CRISP
From: "The Pampered Chef: "It's Good For You"

OUR RATING: LIKED IT!!
Ok, Ryan actually loved this. I really liked it. It was seriously good. I didn't jump out of my seat, but it was delish! I will totally make this again! 


FRUIT FILLING: 

  • 6 medium Granny Smith Apples, sliced (About 8 cups)
  • 1 can (21 oz) Cherry Pie Filling
  • 1/2 tsp. Cinnamon
STREUSEL TOPPING:
  • 1/4 c. 70% Vegetable Oil Spread or Crisco, melted
  • 1/4 c. Sliced Almonds, chopped
  • 1 c. Old Fashioned or Quick Oats
  • 1/4 c. Flour
  • 1/4 c. Packed Brown Sugar
  • 1/2 tsp. Cinnamon
DIRECTIONS:
  • Preheat oven to 375 degrees. Peel, core and slice apples. 
  • Combine apples, pie filling and cinnamon in large bowl. Mix gently. 
  • Place chopped almonds, oats, flour, brown sugar and cinnamon in a bowl. Mix well. 
  • Pour melted Crisco over the top and stir until well mixed. 
  • Spread fruit mixture over the bottom of 9x13 pan. Sprinkle streusel topping evenly over the top of the fruit. 
  • Bake 35-40 min or until apples are tender. Cool slightly. Serve warm, topped with vanilla ice cream, whip cream or for dairy free option, make whipped topping out of coconut milk. Open a can of refrigerated coconut milk (do not shake), skim the thick cream off of the top. Place in mixer and blend on high until it thickens. Add a little cinnamon, nutmeg, sugar and vanilla, to taste. YUM! 
ENJOY! 

TOMORROWS MENU: 
*Leftovers
*ECLAIRS! Don't miss it!

Thursday, December 15, 2011

DAY 2: Sweet & Saucy Meatballs & Homemade Strawberry Ice Cream (made in a blender)

ON THE MENU: 

  • Sweet & Saucy Meatballs
  • Mashed Potatoes
  • Green Salad
  • Dessert: Strawberry Ice Cream (DF,SF)

SWEET & SAUCY MEATBALLS
From: "The Pampered Chef: It's Good For You"

OUR RATING: LOVE IT!!
Oh, were these ever delicious! They were seriously fantastic! The combination of spices with the cranberry sweet sauce is out of this world! This is definitely making it's way back to our table, and soon!


MEATBALLS:
  • 1/4 C. Chopped Onion
  • 1 Package (1.25 lbs) Lean Ground Turkey
  • 1 Egg White
  • 1/4 Seasoned Dry Bread Crumbs (I used Panko Crumbs and threw in about 1 tsp or so of Italian Seasoning).
  • 1 tsp. Dried Thyme Leaves
  • 1 Garlic Clove, pressed
  • 1/2 tsp Salt
SAUCE:
  • 1 can (8 oz) Jellied Cranberry Sauce
  • 1/4 c. Ketchup
  • 1/4 c. Orange Marmalade (I had apricot preserves on hand and used that. Worked great!)
  • 2 T. Brown Sugar, packed
  • 1 T. Worcestershire Sauce
DIRECTIONS:
  1. Preheat oven to 400 F. In a bowl combine turkey, onion, egg white, bread crumbs, thyme, garlic & salt. Mix gently but thoroughly. 
  2. Shape mixture into small balls; place in a single layer over the bottom of a deep baking pan (9x13). Bake 15 min; drain. 
  3. While baking, combine sauce ingredients in a small bowl. Mix well. After meatballs are drained, pour sauce over the meatballs; mix gently to coat them evenly. Return to oven; continue baking 15 min, or until cooked through. Stir gently before serving. 

And for dessert: 


STRAWBERRY ICE CREAM
From: "VitaMix Whole Food Recipes For Better Living"

OUR RATING: LOVE IT!!
I wish I had a picture of my husbands face when he tried this! See with his whole dairy allergy thing, and the fact that he doesn't really like soy or rice ice cream, this is the first ice cream he has had in a long time! And what a way to come back! This is super creamy and full of flavor! It was seriously delish! Add to that there isn't any sugar and WE HAVE A WINNER! Warning: Ice Cream Headache ahead! Go slow and control yourself please! :) 


INGREDIENTS:
  • 1 c. liquid lite non-dairy creamer
  • 1 lb. frozen strawberries
  • 1/2 c. Stevia or other natural sweetner
  • 1/2 tsp. vanilla
DIRECTIONS:

      Place all ingredients in a heavy duty blender in the order listed above. Blend on high until the sound of the motor changes and 4 mounds form in the mixture. Don't overmix or the mixture will begin to melt. If you want to thicken the mixture, or if it is more the consistency of a shake, add another cup of frozen non-dairy creamer cubes (freeze in ice tray). Other fruit may be substituted.

TOMORROWS MENU:
*Parmesan Chicken & Pasta
*Italian Rosemary Bread
*Strawberry Limeade
*Dessert: Apple Cherry Crisp 


LinkWithin

Related Posts with Thumbnails