Showing posts with label Floor to Ceiling Clean. Show all posts

Wednesday, June 30, 2010

Floor to Ceiling Clean

{Be sure to click on "Organization" under 'Labels' in the right hand column! Some of my biggest life savers are listed there!!}


Are you ready for this?!

We all know there are corners of our house that we turn our heads from when we walk by. Just another something that weighs on our minds! But seriously, when do we ever have time to touch up the paint, scrub the walls & baseboards, etc. with all the OTHER cleaning we have to do?

A couple of years ago I was helping my friend Jeni clean her house for her move. While we were cleaning blinds, baseboards, magic erasing all the spots off the wall, etc. I thought, "WHY in the world does our homes get this treatment usually only when we are moving and we won't get the chance to enjoy it?!"

Then while talking with my dear friend Shalece about the rumor of her bleaching the walls in a different room in her house once a week (which we all lovingly tease her about, but REALLY we all want to do the same), I combined my feeling I had with the "Move Out" clean with the wisdom of my friend's ever clean home and came up with something that TOTALLY has saved me!

Saved me, as in I have a clean house. Not just look clean, but FEEL clean. It stays that way most of the time...I mean, I am a natural slob afterall! :) See because if it feels clean, there is a natural tendency to want to keep it up...WITHOUT being a clean freak, my children think I am a cleaning nazi, type Mom.

My goal.....
If I had to move out of this house tomorrow I could pick up my stuff, vacuum my way out of a room and be done with it, KNOWING that I am leaving it CLEAN for the next person.

But more importantly, a house that is off my mind. I don't like the NEED for attention in an area of my home to weigh on my mind and give me stress. I like to spend 30 min TOPS cleaning per day and still have a totally organized and tidy home. It makes me a better Mom. It makes my kids happier. It helps my home REALLY be a place where there is peace and a feeling of order.

Let's just get to it, shall we?! I mean, I WANT to talk you into doing the same in your home. I WANT to let you know it will totally change your life and free you for more important things, but hey.... why don't I just teach you, and you can test it out yourself! :)

FIRST:

Divide your home into 8 sections or themes. For example: if you are choosing themes you would do something like: Bathrooms, Kids Rooms, Office, Kitchen, etc. I use sections. Here is the way I divided mine up.....

  1. Downstairs Bathroom & Office
  2. Living Room & Family Room
  3. Dining Room & Kitchen
  4. Downstairs Hallway & Closets
  5. Stair way, Upstairs Hallway & Linen Closet
  6. Kids Rooms
  7. Kids Bathroom & Master Bathroom
  8. Master bedroom & closet
 This list is organized based on the way I usually tidy up my house. I start at the furthest corner and work my way up.

Now gather your supplies:
Here is what I use:
Don Aslett Cleaning kit, including microfiber mop
Magic Eraser
Window Cleaner & Squeegee
Paper Towel
Vacuum or broom & mop
Touch Up Paint & Spackle
Measuring Tape
Notebook
Labeler

I store all of these things together. It is a quick and easy grab. Except for the notebook. That LIVES in my purse, I will tell you why.

NOW, each Monday is my "Detail Room Cleaning Day". Let's be honest, the first time through will take you longer than 30 min. It will be worth every bit though! You are going to wash the walls from ceiling to floor in just minutes, removing all stubborn spots with your Magic Eraser and touching up dings as you go.

I am going to walk you through how I clean. However, to do this the best way I am going to show you according to rooms or the "Theme" method. That will keep this all organized!

Let me explain the notebook really quick. Then I want you to gather your items and meet back here tomorrow for our first group of rooms....The Bathrooms! FUN! Let's just get them right out of the way! :)

The Notebook:
Usually as I am cleaning a room I have little thoughts like, "Oh! I could really use_____for this room, etc." or "I need to remember to buy_______".

Then I also have the problem of getting to a store like Tai Pan.....Oh Tai Pan! :) Then, I can't think of one dang thing I really need.

So, here is the solution.

On a page of the Notebook I write the Room Name on the top of the page. Then I make three colums: NEED, DECOR NEEDS & FIX OR FIND OUT ABOUT.

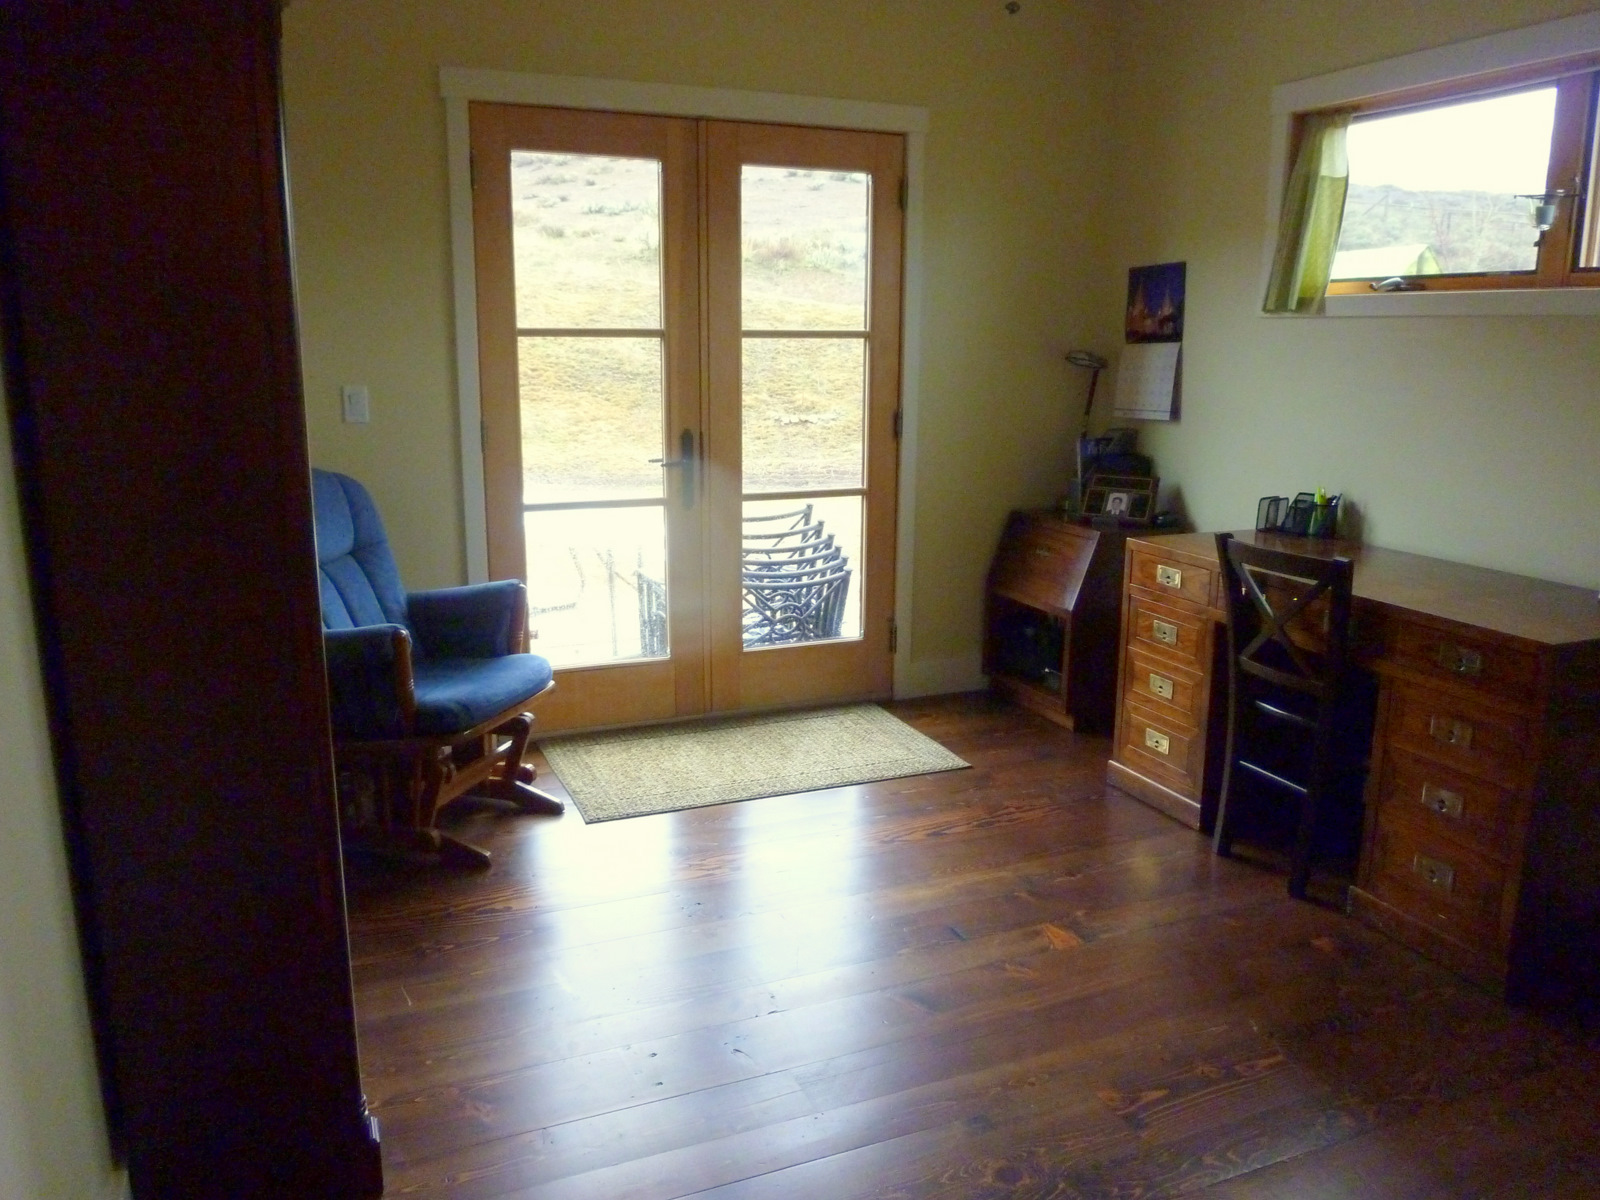
For example: When I did my husbands office I thought, "This room could really use a potted tree and a hanging plant" So I wrote both of these on the list of Decor Need.

Then I noticed that the book shelf light bulbs were burnt out. They went on the NEED list.

The floor is in desperate need of a rug. Pulled out the measuring tape and figured I need an 8' X10' rug.

I noticed that there is a light switch in the room that doesn't turn anything on. That went on the "Find out about" list.

These are not things that are taken care of all at once. They live on the list until I can budget them in and check them off. The list lives in my purse so I can refer back to it if I am at a garage sale, TAI PAN, hardware store, etc.
The purpose of the notebook is to get it off your mind and put it in a place where you know you can get to it and take care of the items as you can!

Alright, let's let that digest and let you gather yourself. Pick a day of the week that will be your "Detail Cleaning Day" and meet back here tomorrow for a HOW TO on Floor to Ceiling cleaning tips!

See you then!


Tuesday, June 29, 2010

Floor to Ceiling Clean: Bathrooms

Bathrooms, Bathrooms, Bathrooms....I HATE to clean them, but I LOVE when they are clean!

This is my hubby's office bathroom. I am telling you, when we first moved in I thought the showers were going to KILL me with all that glass! Yes, they look great when they are clean, but to get them there....UGH!

That is where the "Showers N Stuff" by Don Aslett comes in. Now that is some good stuff!


However, lets not get ahead of our selves. Let's do this step by step!

Remember the idea is to make it FEEL clean! You are going to cover every bit of your bathroom! Every bathroom is different. So just take the basic idea and do what works for yours.


  • Let's Start with the Cupboards & Drawers
  1. One at a time pull everything out.
  2. Once it is all out, completely wipe the inside down.
  3. Put it all back in as you organize.

  • AS YOU PUT THINGS BACK IN:
  1.  DON'T be afraid to TOSS out that lotion that you swear you were always going to use, etc. If you are struggling with the idea of tossing it, give yourself a rule. If it isn't being used by your next cycle through this bathroom in 8 weeks, it's gone!
  2. If you have little girls with hair bobbles, elastics, etc. Organize it. Use ziplocs, if you are going for cheap or to get you by until you get those drawer seperators/organizers you just put down in your notebook under the "NEED" column.
  3. Make sure that everything is put back in a way that it will be easy to maintain. If it is cluttered, it will be back to a mess in a couple of days. Work out whatever is best for you for storage/organizing/throwing away!
  • Hit the showers and tubs.
  1. Always follow the instructions carefully for any cleaner you are using. I have heard some nightmare stories.
  2. Spray down the inside of the shower. If you have tough hard water stains or stains at all, I highly recommend "Showers N Stuff" by Don Aslett. Spray it on and wipe them back of a couple of minutes later. It is the only thing, that I have found, that works well enough to leave your shower looking like new!
  3. After a few minutes wipe off the cleaner with a damp clean, preferrably microfiber cloth. It will leave a nice shine. 
  4. If you still have stubborn stains....I use a magic eraser in my tub. If you have scratches or anything in your tub that are showing up, it is because there is dirt. Use a "Magic Eraser" by Mr. Clean. It works miracles! I also, at times, spray my shower or tub down with bleach and let it sit, then simply spray it off at the end of all the cleaning. Easy. However, with all 3 of these things I have suggested....DON'T mix your cleaners without rinsing with water several times. I wouldn't want any one of you passed out OR WORSE while cleaning your bathroom! Mixing is NEVER a good idea! 
  5. Keep a squeegee in your shower and take a few seconds at the end of the shower to wipe the water from the glass or walls.
  • Now we are going for the Toilet. 
  1. Once again, I know I sound like an informercial, but SERIOUSLY, this cleaning is SO much easier with Don Aslett stuff. The toilet wand and cleaner is a fave, also. Follow the instructions to wash your toilet. 
  2. If you have a ring around your toilet bowl, go pick up a toilet Pumis Stone. I love those things. 2 seconds and that ring is gone! 
  3. I use an old toothbrush to scrub around the bolts in the seat and base of the toilet. If I am in a crazy mood, I take the toilet seat off the toilet all the way and clean it all. Let's just be honest here. Little boys = nastiness around the toilet. YUCK! 
  4. Scrub every part of the toilet. Base, bowl, seat, tank, handle, all of it. Make it shine! See your face in it! :) 
  • Time for Walls & Baseboards
  1. Walls are so easy with a microfiber mop! Spray your cleaner on the wall and MOP THE WALL. Easy peasy! Work your way across the wall. Heck, do the ceiling while you are at it, if you want! You will be so surprised how fast you can book through a task that used to be tedious and torturous! DON'T skip this part! This is where the truly clean feeling comes from! It is the best! 
  2. Now take a rag (microfiber are best) and spray around the molding of the doors and wipe them down. As you go, if you notice any scuffs, "Magic Erase" them away. If you need to touch up any area with paint. Do it. If you need to spackle a nail hole or a gaping hole, do it. Now is the time. 
  3. Wipe down the doors, door knobs and light switches. 
  4. Wipe down all light fixtures. Take any glass covers down, CAREFULLY and wipe them down. Wipe down the toiletpaper holder, towel rack and anything else that needs a little TLC. 
  5. Spray your baseboards and wipe. Again, fix any scuffs with a Magic Eraser and touch up paint where needed. This process seems like it will take a while, but you should be done in 5-10 min. tops. Maybe longer the first time you go through. However, the next time you come in for a deep clean, it will be a breeze! 
  6. Use a vaccuum hose and the brush attachment to vaccuum any vents.
  • Wipe Down the Mirrors and Windows
  1. Use glass cleaner and a squeegee for best results. I also love using newspaper to wipe down glass.
  2. Pull out screens and rinse them with water. Let them dry before you put them back in.
  3. Wipe down windowsills.
  • Wash counter tops & sink, garbage cans & anything other accessories you have.
  1. Again for hard water spots or any sort of stain, use Showers N Stuff.
  2. I use the paper towel to really wash down the garbage can.
    Don't be afraid to use a toothbrush to get a really good scrub. Not the same one you used for the toilet, please! :) You might want to label those!
  3. My aunt taught me to wash with wet and then wipe down with a dry cloth to get a good buffed shine. I LOVE that for the bathroom!
  • Now for the floors
  1. Wash all rugs.
  2. Sweep floor thoroughly.
  3. Get a wad of Papertowels a little damp and go over the entire floor. Pay close attention to corners and around the kickboards on counters. This will help pick up anything you missed with the broom.
  4. Using a floor cleaner do a thorough wipe down of the floor. Don't be afraid to use a scrub brush, if your grout needs a little extra attention. I mean, this is supposed to be "no rock left unturned" cleaning.
  • Serve dinner on your bathroom floor....cause you will be able to! :)
Ok, ignore that last one, cause well....YUCK!

Don't forget to make a list of an items you need in your notebook. Lightbulbs, washclothes, plants for your toilet tank (I love a good potted plant, plastic of course, for the back of my toilet. I don't know why. Just do.), rugs, towels, ANYTHING! Write it down!

Congratulations! You now have one seriously clean bathroom!

Now remember to do you "3 Wipes in 3 Minutes" and between that and your weekly, less intense, cleaning of the bathroom, you will have a bathroom you won't be afraid to let your neighbors use! :) Cause we all know we have felt a bit afraid of such an occurance from time to time! :)

Don't be intimidated. Focus and work hard and fast and this whole process will take only about 30 min. tops! Don't be discouraged if it takes longer at first! It will be worth the time you spend and it will get faster. MUCH faster! PLUS you only have to do that once every 8 weeks.


Monday, June 28, 2010

Floor to Ceiling Clean: Office/Den

How have you done on your Bathrooms from last week? Did you survive? I hope so! I have had A LOT of positive feedback! Good job you guys!

Let's move to the next "Theme" for this week:


This is my hubby's office. It generally looks a lot more like this.....

OR WORSE!

Guitars & Amps, papers and junk, sometimes backpacking garb. Whatever! However, I have learned over the last 12 years that he needs his space to spread his crud out. I am totally fine with it. However, occasionally it needs my TLC.

Just keeping it real....if you ever look close enough at a lot of my shelves, they are much like this!

Curse you dust! Dusting is a skill I could be better at!


See! It looks SO much better when it is done and clean!

Now this closet is in trouble! There has always been one closet or drawer in my house that is the "junk" spot. However, in the spirit of Floor to Ceiling clean, I was determined to beat it!

And so I did! All of my hubby's GEEK games, etc. have a place. Not to mention the "CAPTAIN" sign we found and HAD to have. One of my hubby's old friends used to call him "Cap'n Ron". He would appreciate this sign! :)

Alright, so let's cover a general step-by-step for an Office type area, shall we?!

  • CLEAN UP
  1. The best way to ensure a successful clean is to make sure that you give everything a place. NO CLUTTER! Go through everything in the room. What needs to go, and what needs a place. What are you undecided on? Make a pile. Box it up and put it in storage. If you don't need it within the next 3-6 months, TOSS IT! That really is the best way to break yourself from things that are causing clutter.
  2. If there is a desk, go through it. Go through drawers. Don't forget to use your notebook to write down drawer organizers or anything else you may need to buy.
  3. Go through files. Are you a paper saver? I used to keep all Utility bills and statements for at least a year. However, now that there is so much online, I tend to keep 2-3 months worth and toss the rest. Do what you are comfortable with. Remember that if the company is online, there is access to your account history there and access to your payment history on your bank statements.
  4. Organize book shelfs, closets, etc. Remember less is better. Keep in mind your three catergories. "What needs to Go", "What needs a place" and "What am I undecided on". If you can't find a specific place for something, perhaps it needs to go in another room or you need to make room somehow.
  5. Wipe down all furniture in the room. Don't be afraid to use the brush attachment on the vacuum. That is one handy little bugger!

  • WALLS & BASEBOARDS
  1. Lightly spray a wall with cleaner. Don Aslett's "Heavy Duty" cleaner is great for this because it is a degreaser for fingerprints.
  2. "Mop" the wall with your Microfiber Mop, or whatever you have. Repeat on all walls.
  3. Pull all furniture out from the walls during this process. This will ensure a COMPLETELY clean room!
  4. Using spray and cloth, lightly spray baseboards, doors & knobs and wipe down completely.
  5. Using your "Magic Eraser" remove any scuffs or stubborn spots.
  6. Touch up paint and patch unused nail holes, if needed.

  • WINDOWS
  1.  Use your squeegee and window cleaner for the best results. Get inside and out, if possible.
  2. Pull out screens and rinse them off. Wait until completely dry before replacing them.
  3. Clean out windowsills.

  • DETAILS
  1. Take down light figures and clean with warm soapy water. Dry completely before replacing.
  2. Ceiling fan? Wipe it down really well, especially those blades.
  3. Paying attention to specific details in the room is what will make all of your effort worth it! Look around for anything else that might need cleaning.
  4. Vacuum dust out of any vents in the room.
  • FINISH UP BY SWEEPING & MOPPING OR VACUUMING THE FLOORS AS YOU LEAVE.
**Remember Don Aslett's Cleaning Center is offering a special deal for YourLifeUncommon.com reader!
At check out in the store or online enter:

  •  The code AL5410 and get $5 off.
-or- 
  • On a purchase of $60 or more you can enter the code AL10410 and get $10 off.
These codes are only good until May 21st, but keep your eyes peeled for MANY more giveaways and deals from Don Aslett until then and after!


Sunday, June 27, 2010

Floor to Ceiling Clean: Living/Family Room

Alright, of course you want to start with a general pick up. It is always easier to really deep clean if you start with a clean slate!

  • DUSTING
This should be VERY thorough! I am talking the back of the TV, under the TV, on top of furniture, shelves and all of the goodies on the shelves. Use glass cleaner to give the TV a good buff (and all the other glass in the room, while you are at it).

  • POLISHING
Oh yes! This is where the elbow grease really pays off. Get a nice furniture polish. I use, of course, a Don Aslett polish that I LOVE. Put a small amount on a rag and polish all of your wood from top to bottom. Not only does this make it look fabulous, it is an amazing way to cut down on dust! Try it! You will love it!

  • THE COUCH
Now wait! Why should the couch gets it's very own section?! Well, because it deserves it! Is there another piece of furniture in the room more used and abused?!

  1. Remove all removable cushions and do a thorough vacuuming on both the cushions and the cushionless couch.
  2. Now this is where we go nuts! Call a carpet cleaner to come and help you with this, or to save a load of money, run to your local Albertsons and rent a cleaning machine yourself. Thoroughly clean all the of cushions and pillows on the couch! I know, this is a little nuts right?! However, it needs to be done and what better time! You will be glad you did it!
  3. When the cushions are dry, replace and move couches to vacuum underneath, dust and wash the walls behind.
  4. Replace when finished! LOVELY!

  • WALLS & BASEBOARDS
By now you know the drill. Spray, then mop. Spray, then wipe. Magic Erase and touch up paint and dings! EASY!

  • WINDOWS
Wipe out the sills and squeegee the windows. By now you are a pro and this is really not taking too much time! Don't skip this part! It really makes all the difference!


  • FLOORS
If you have wood floors, give them a really good scrub down. If you have carpet, well PERFECT! You have a carpet cleaner now, so put it to use!

While you are cleaning and picking up, remember that less is more and to give everything a place. THAT IS KEY! If you give everything it's own spot then you will not have any troubles with everyone putting things where they go during  clean up! AND NO MORE CLUTTER!

Follow the simple rule of "If you don't know if you need it, box it up. In a few months, if you haven't touched the box, TOSS IT!" When you hold on to things for "Someday we might want to.." 's You will end up with a lot of clutter quick!

How is it coming! I have LOVED all of the emails I have got about this! I love hearing about your progress! Keep them coming! Email, comments, whatever! I LOVE hearing from readers!


Posted by Picasa

Saturday, June 26, 2010

Floor to Ceiling Clean: Toys

If you are a mother of little ones, you KNOW toys deserve their own post. They are everywhere. Hard to contain. AND it is hard to find a way for the kids to put them away where they go. Let's work on that today, shall we?!


Oh, I wish I could take full credit for this. But alas....It was my dear friend Tana that directed me in the way of shelves and boxes. It saved me! TOTALLY! Now let me pass the same on to you!


  • DE-JUNK
That means you McDonald's Happy Meal toys! You are GONE-SVILLE!
When my kids get a Happy Meal the toys are great fun until bedtime, and then they are gone. Find a new home for toys that are too young for your kids. If they are broken, missing parts, colored on, etc. It is time for them to go. Usually we have too much of an emotional attachment to the toys. Don't create, "but what if you ever want to..."s or "we should save this for the grandkids", etc. If there isn't a sentimental connection to the toy and reason for handing it down, let it go. Remember less is more. Easier to clean up and easier for your kids to play with.


  • CLEANING & CATERGORIZING 
Seperate the toys into different catergories (blocks, dolls, balls, trucks, etc)
Get out your sanitizing wipes and give each toy a good wipe down.
Braid wayward doll hair, dress the barbies...not nudity allowed in the toy box! :)


  • ORGANIZING
I'm not going to lie. I almost giggle with glee at the idea of the next part. I LOVE this! Oh sweet wise Tana. Thank you for sharing your wise wise ways with me!

Find a enough bins or boxes to put each catergory into it's own space. I used the cute colored cloth boxes at Target. SO FUN! I didn't have a cupboard or closet to put the toys in, so I bought shelves from Costco.

Now, group the items together in a pile. Take a close up picture of the toys(click on the picture above to see the details on my boxes). Print all of the pictures and laminate (or cover in packaging tape. Yeah, I am that cheap and it worked just fine!). Attach the picture to the front of the box by taping, or because mine were cloth, I safety pinned them and added ribbon to cute it up a little).

Arrange larger toys so that they are easily attained and easily put back in their place.

Here is the beauty and magic to all of this....
Whenever you call "CLEAN UP". No matter the age of the child or who they are, every child will know where each toy goes. It almost makes it fun for them to clean up. They enjoy sorting the toys into their proper place. They will do it. You will see! And you will love Tana for it too! ;)

I have used this system for almost 2 years. I will never go back from it. I love it dearly! My kids clean up quickly, as do their friends. It keeps everything in it's place and looks bright, fun and inviting for any child! Love that!


Thursday, June 24, 2010

Floor to Ceiling Clean: The Kitchen

Oh, the Kitchen.....what more can we say?


There is nothing like beadboard cupboards in the kitchen to remind you of just how messy you are! OH MY! Let's get this all cleaned up, shall we?!

  • ORGANIZING
  1. Start by going from cupboard to cupboard, pantry to fridge. Throw out the things you don't need and all of those empty boxes (does that just happen at my house?! UGH). 
  2. Call me crazy, but I organize my spices in alphabetical order. I know, a bit obsessive, but it makes for quicker finds when I am using a not so common seasoning. 
  3. Don't be afraid to throw stuff out. If you don't use it, give it to a second hand store! JUST DO IT! If you should ever need one, borrow it from a friend that has it! 
  4. Check for expiration dates on everything. Throw it out if it has expired. 
  5. Just a side note on the fridge: Get in the habit of giving it a complete wipe down each week or two. Every time you bring a load home from the store, shift things around and wipe the shelves down. This will make your life SO much easier and your fridge ALWAYS clean with very little effort! 
  6. As you go through the cupboards, pull everything off the shelves and wipe the shelf down. This will help in giving your kitchen the clean FEELING we all love! 
  • THE WIPE DOWN 
  1. Once your cupboards are cleaned out, wipe the fronts of them down thoroughly. I use Don Aslett's Heavy Duty cleaner because it is a GREAT de-greaser. It makes your work super quick! With my beadboard I used a butter knife tucked into my rag to get in the cracks. I also occasionally broke out a toothbrush or even a toothpick. Yep, I'm insane! :) 
  2. Wipe down the front of your appliances. If you have stainless steel appliances don't spray the cleaner directly onto it. Spray a rag, wipe it down and then quickly (while it is still damp) use a dry cloth to buff. If you don't have stainless steel, break out a magic eraser! It is the best thing in the world for getting into all of the little lines and creases! 
  3. Now we are getting serious! Get down on your hands and knees and scrub those toe kicks. It is the space where the cupboards and the floor meet. While you are there get a good scrub on the corners and edges. 
  4. Pull out the appliances. Wipe down the floor underneath and the sides of the cupboards and appliance. 
  5. Wipe down the table. If you have a leaf in your table, pull the table apart and wipe down the cracks. Wipe the sides, legs & chairs really good. 
  6. You know I am going to remind you about the walls. Mop them, just like you have done in your other rooms. Make sure you get the baseboards, trim & doors. 
  7. Wash the windows. 
  8. Set your oven to "self-clean", if you have the option. When it is finished and cooled, wipe out what is left over. If you don't have "Self Clean" use an oven cleaner for best results. 
  9. Clean your stove top, microwave and exhaust fan. Use a de-greaser to make your work easy. 
  10. Clean your sink. Use bleach for the best clean. Use a toothbrush to give the faucet the best shine. Buff until you see your face in it. 
  11.  Wash Windows. 
  • Sweep & Mop
Pay close attention to the edges and corners.
PHEW! Now that is a good job to have done! I love a good clean kitchen! Enjoy it!
  

Thursday, June 10, 2010

Floor to Ceiling Clean: BEDROOMS

How is it all going so far?! Are you loving the results of the Floor to Ceiling clean?! I am hearing good things
from so many of you! I am so glad! I really love hearing from you!
So let's get cracking on the bedrooms in the house, shall we?
GET ORGANIZED:
 For some reason this is one of the hardest place to "purge". Don't be afraid! You will love the result! Just be honest with yourself in the answers to "Do I REALLY need this?", "Do I use this?", "Will I ever use it?" type questions and you will be well on your way to a clutter-free bedroom! Remember, it's just STUFF. Stuff is always replaceable!


  1. Remember when we did the Toys? Well, the bed room gets the same treatment. Anything under the bed, in the closet, etc. that is not clothing goes in organized bins. Go get your self a labeler and some cute bins and go to town! Toss the stuff that you don't need to keep, and by toss, I mean DI or another second hand store.
  2. Go through the clothes in your closet and drawers. Really, how much of it do you pass up day after day and your not sure if you will EVER really wear it. TOSS IT!
  3. Those who have visited my closet know that I also sort my hubby's clothes and mine by using different color hangers. His are all blue hangers and mine are all white. Then the clothes are organized according to color....I know....a little OCDish RIGHT?! Well, try it once and you will never go back! :)


THE WIPE DOWN
  1. Wipe down all shelves, drawers (inside and out), walls & baseboards
  2. Break out your furniture polish and wipe down all of the furniture. This is what really makes the difference. You will be glad you did it. 
  3. Wash all light fixtures, ceiling fans, etc. 
  4. Pull furniture away from the wall and clean underneath and behind EVERYTHING! 
  5. Wash curtains and/or clean the blinds. Use the dusting tool on your vacuum to get the loose dust off the blinds. Wipe down spots that need extra attention, or take the blinds down and hose them off outside. This won't always be enough. Use a warm soapy rag to wipe the spots clean. Let them air dry. 
  6. Wash all the windows.
  7. Vacuum using that sweet little "get into the edges tool" for around the baseboards. 
If you need details on how I quickly clean walls, etc. you can refresh by going HERE, or click on the "Floor To Ceiling Clean" link under labels on the right hand side of the screen.   


Wednesday, June 2, 2010

Floor to Ceiling Clean: The Laundry Room

 How is it that the room where you do all the cleaning can get so darn dirty?!


We all have different sized laundry rooms. Some are as big as any bedroom, some a bit smaller and some simply a closet. Whatever the size, they require cleaning. So let’s get to it, shall we?!

THE WIPE DOWN

Start with the Washer:

  1. Pull off removable panels and get ready to wield a toothbrush!
  2. Be sure to scrub then wipe down all the nooks and crannies.
  3. Pull it out from the wall and wash the wall behind and the floor underneath.
  4. Make sure all tubes and hoses are in their proper place before you push it back!

Now for the Dryer:

  1. Pull off removable panels and set your toothbrush to work again.
  2. Remove lint trap scrape all the lint off
  3. Now run the screen under HOT water. This will remove the film or build-up that can form. When the water runs through easily, your job is done. Dry completely before putting back.
  4. Pull it out from the wall and wash the wall behind and the floor underneath.
  5. Make sure dryer venting doesn’t get pinched as you are pushing the dryer back in place.

Walls & Baseboards:

You know what to do here!

  
Sinks, Shelves, etc:

Wipe them all down.

ORGANIZING

Make it a fun place to be. Get little bins, jars, or anything else that you love and put it all together. Add a flower pot to freshen it up. Let’s face it….laundry can cause a bit of grumbling! However, if you get yourself put on a laundry schedule LIKE THIS ONE and add a flower pot to a shelf or paint the room in a fun color, it can make a big difference!

Next week is the last week in this Floor to Ceiling Clean series! YAY! Are you so excited?! LOOK HERE if you would like to review any of the other rooms.

Tuesday, June 1, 2010

Floor to Ceiling Clean FINAL WEEK: Hallways & Closets

Alright everyone! We are on the last section of the house we will cover. After you finish this, if you have areas in your home that have not been covered, figure them into your cycle. Your cycle will likely take no more than 8 weeks. This way every two months each room gets the deep clean and with that frequency it really narrows down the amount of time you will need to spend cleaning. How great is that?!


Have you felt the difference in your home? Are you loving it? I hope so! It truly makes a huge difference.


So, let’s get on with this last part.


HALLWAY’S

This is easy now. We know what is required for the floor to ceiling clean. Simply, wash walls, wipe baseboards, dust pictures, repair un-used nail holes, fix any damage and touch up paint. Easy enough, right?! Right.


CLOSET’S


If you are anything like me, these random closets can be the destination spot for those things that don’t have anywhere else to go. Oh, I always seem to have a junk drawer or closet somewhere in my house. It is my goal to get past that! Just give it a home or give it up. That’s what I will tell myself! :)

So, go through each item. If you have games, this is the perfect time to go through and ensure all pieces are present. If they are not. Chuck the game. Go through coats, tools, etc. Anything lurking in the closets.

Remember to make a list of items needed. Maybe a Rubbermaid drawer system will be handy here, or bins of some sort. Don’t forget to label everything. The key is to give everything a place! That way clean up becomes a breeze and clutter is gone forever!
Wipe down the walls and shelves in the closets.


DONE!


This should be the final touch to making sure that your home is completely clean floor to ceiling! Through the next cycle you might find yourself wanting to skip a step or too. Like wiping out light fixtures or washing the walls. Don’t do it! This is what keeps the job easy and done. When you let the dirt build up, you have to live with it until you find time and energy to scrub it all over again. If you keep on top of it, you will enjoy it SO much more!

Now, if you have any questions, feedback, tips or secrets you would like to add, please feel free at anytime to leave a comment. In fact, I WOULD LOVE to hear some of your ideas. If I get enough, I will just add another post for the Floor to Ceiling Clean with all of your ideas in them....you know, for posterity :)What are the things you do that make a huge difference? How do you keep on top of organizing, cleaning, etc? What about products that are MUST HAVES for you? I would love...really love....to hear from you!

LinkWithin

Related Posts with Thumbnails