
HOLY SMOKES I DID IT!!
My hubby is allergic to dairy. I have mentioned this before. Well, I am a soul that enjoys a good challenge, so while boasting about my abilities to figure out non-dairy recipes for things that my hubby used to love my son offered up this challenge: "Mom, I will not believe that you are the master of all things non-dairy (Ok, maybe not his exact words, but close) until you can figure out a way to make dairy free Milk Duds!"
This little turkey! Surely he thought of the most milky pleasure my husband had ever indulged in and tossed it out to me as an impossibility....but alas young one, don't you know that your mother thrives when faced with such a challenge?!
Jakob, Ladies and Gentlemen, my dear previously Milk Dud deprived husband....allow me to introduce to you not one, but THREE heavenly creations! I give you......
DAIRY FREE HEAVENLY CARAMEL SAUCE,
DAIRY FREE HEAVENLY CARAMELS
and
DAIRY FREE MILK DUDS
All divine! Caramel as good as the original milky version...with just the slightest coconut flavor to push it over the edge of amazing! ENJOY!
(and now I shall go and find my humility once again! I let this one get to my head a little!)
Alright, before we get too far into this, please make sure you have an accurately working candy thermometer, wax paper and I highly suggest parchment paper....cause it is amazing!
The ingredients you will need for the caramel portion are:
*1 cup Dairy Free Butter - Unsalted. (I used Best Life Butter)
*1 cup Light Corn Syrup
*14 oz of full fat Coconut Milk (I like Taste of Thai best)
*2 1/4 cup Brown Sugar
*1 tsp. Vanilla
You will also need around 1 hour cooking time, plus time for wrapping caramels. This recipe should make about 50 caramels, depending on size.
Alrighty! Let's get started!

- Cut butter into smaller, even sized pieces, so it melts evenly. Melt over low heat.

- Carefully add sugar to the center of the pan. You don't want the sugar to crystallize on the side of the pan, or your caramel will turn out grainy. Not good. Just stir it in until it is well mixed, like this.....


- Now stir in your Corn Syrup.

- Then your Coconut Milk. (Coconut will separate if refrigerated. That is great for recipes where you want to make a whipping cream out of Coconut Milk, or if you need the solids. For this, I just pull a can off the pantry of the shelf, shake it to be sure the solids and milk/water are combined and use it all.)
- Cook and stir on medium heat. After one minute at medium, raise the temp to medium high until it starts to boil. You are only gradually raising the heat because you don't want to "shock" the candy.
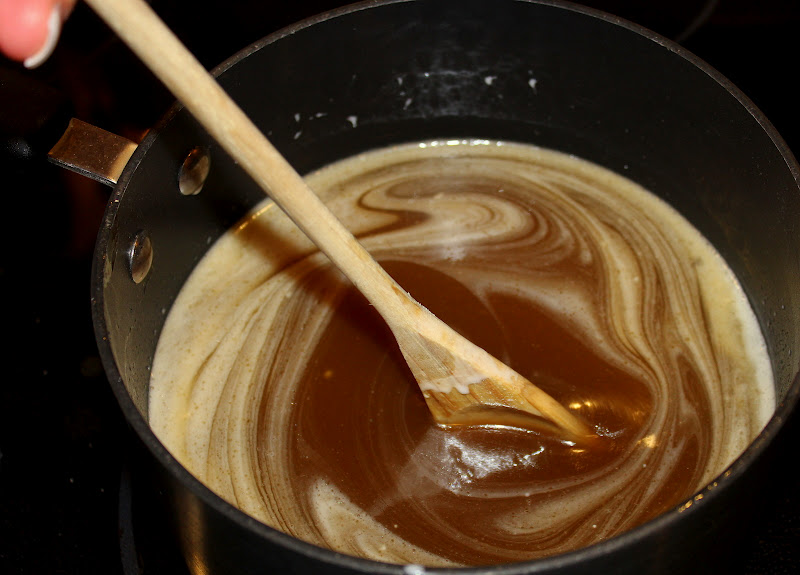
- Continue stirring. As you stir and as it comes closer to boiling the milk and butter will begin to blend. It should be blended or close to once it starts boiling. Be sure to keep with the stirring! It will get there!

- Once it starts to boil clip your candy thermometer onto the side of your pan. MAKE SURE the thermometer isn't touching the bottom of your pan.
- Reduce your heat to medium, and adjust as necessary to keep an even rolling boil.
- KEEP STIRRING! If you don't stir your caramel enough the butter will separate and you will end up with a greasy batch of caramel! Caramel takes a lot of time and a lot of work, but it is SO worth it in the end!

- Temperature does not raise at a steady rate! Watch carefully!
- When your thermometer reaches 230-233 degrees if want to pull any caramel out for caramel dip or sauce for ice-cream, apple crisp, or whatever, this would be the time to do it.
- At 234-240 degrees, caramel is ready for apples, if you want to go that route....or any other sort of thing you might want to dip for a caramel coating.

- When the thermometer reaches 244 degrees (which will take about 30-45 min or so, from the start), remove the caramel from heat.
- Stir in Vanilla.

- Pour Caramel onto a cookie sheet lined with parchment paper.
- Non-Dairy butter separates different from normal butter. This caused a different look to my caramel when I poured it out. No worries! It evened out and looked and tasted fantastic!
- Cool for several hours!

- Once it is cooled you can use a knife, scissors, pizza cutter or whatever you fancy, to cut the caramels into pieces. Wrap in wax paper.
AS FOR THE MILK DUDS......

- Oh thank heavens for Ghiradelli semi- sweet chocolate chips! They are dairy free....did you know? Yes, they are semi sweet, so you don't get the same milk chocolate sweetness, but for a man deprived of all things chocolate until the discovery of these treasures, it was manna from heaven! Besides, the sweetness of the caramel counters the semi sweetness of the chocolate! They are delish!
- I melted a bag of these chips in a bowl in the microwave. Remember to melt for 30 seconds and stir, then melt and stir, until they are totally melted.
- I dropped each piece into the chocolate and picked it back up using 2 spoons. If you can find a better way, go for it! Just be sure to work fast! The caramels will melt in the hot chocolate and the chocolate will gradually get harder.
- Place each piece on a parchment lined cookie sheet and place in the fridge to harden the chocolate.
ENJOY!
1 comment:
Yum!!! Now can you make a sugar free version for me?
Post a Comment